ONE BUTTON STUDIO

Welcome to the One Button Studio (OBS), an intuitive and user-friendly solution that can help you produce high-quality videos with the utmost ease. OBS is designed as a simplified video recording process that eliminates the need for any prior video production expertise. Whether you intend to record video presentations, lectures, or instructional content, the One Button Studio has got you covered.

00:00
00:00 / 00:00

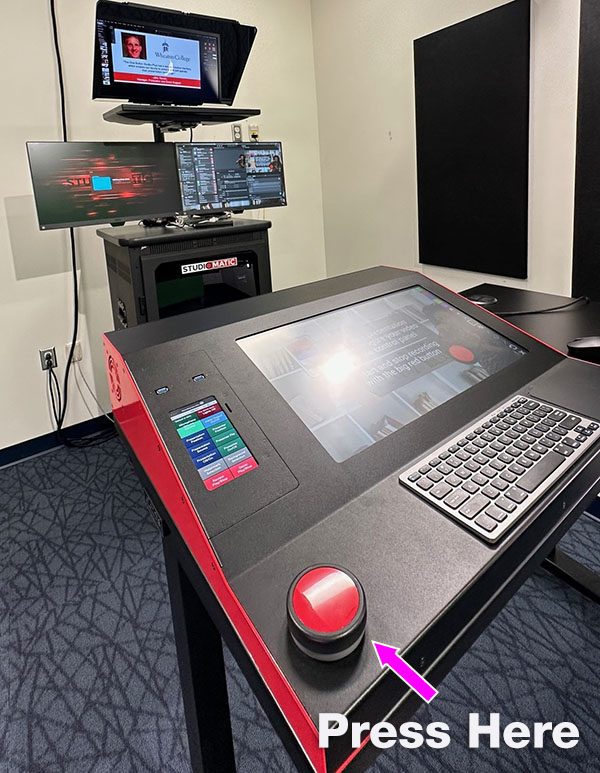
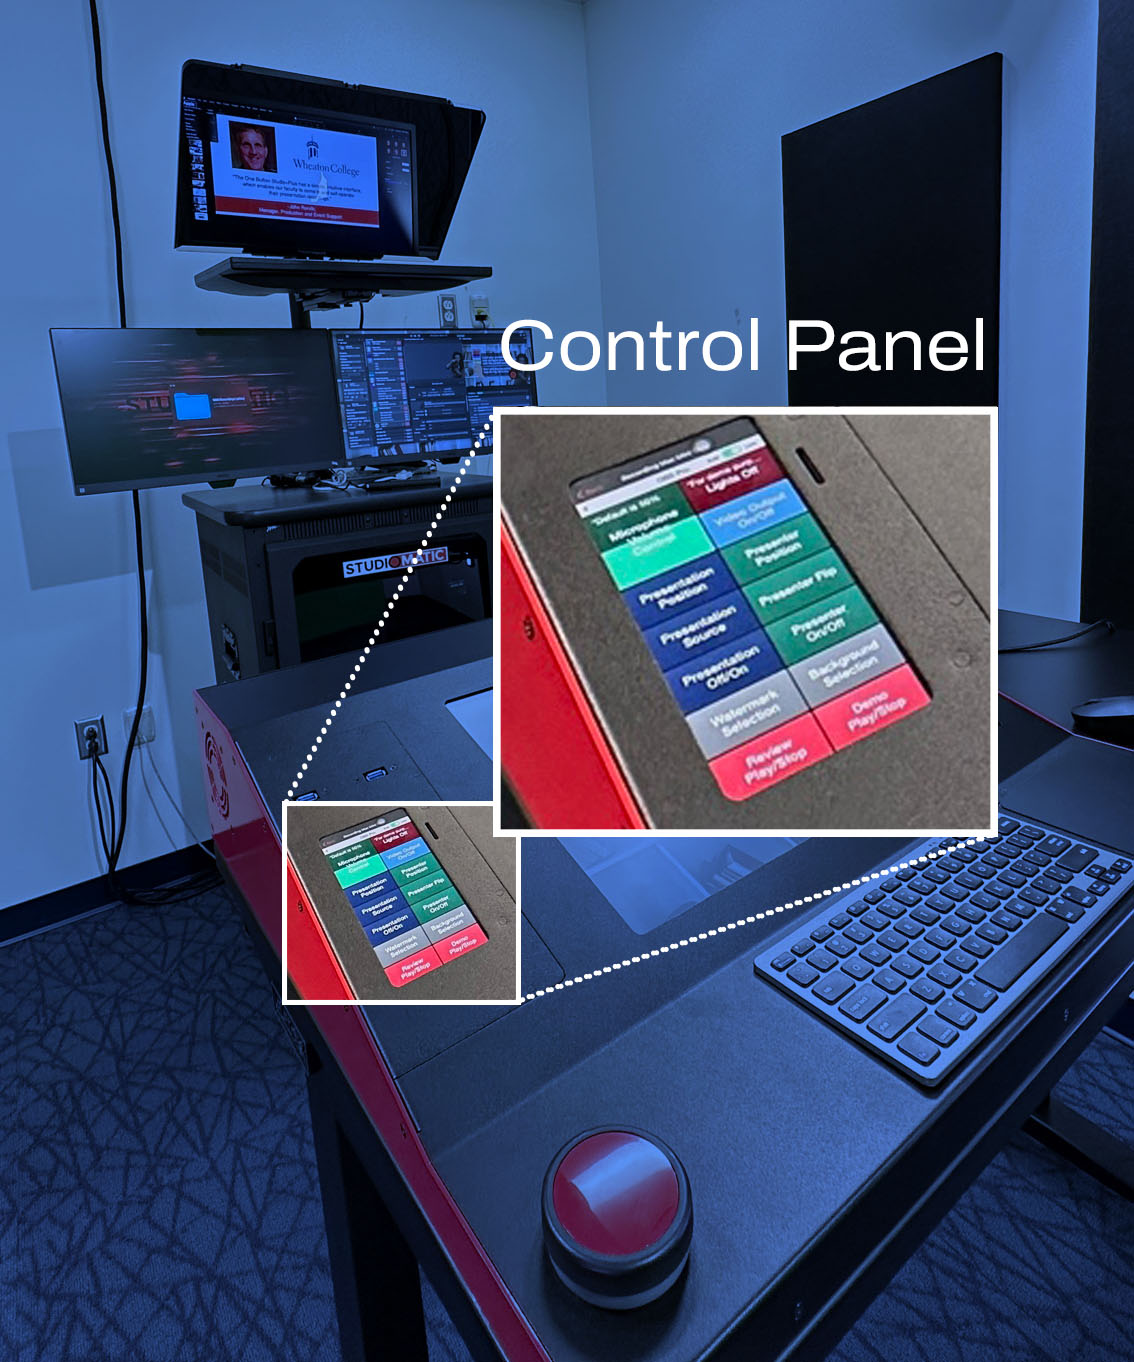
Operating OBS is a straightforward process.

It takes just two steps:

1. Simply press the button to begin your recording.
2. Then press it again
to stop.
Photo indicating the location of the red button in the One Button Studio

Building Photo of Gornto Hall

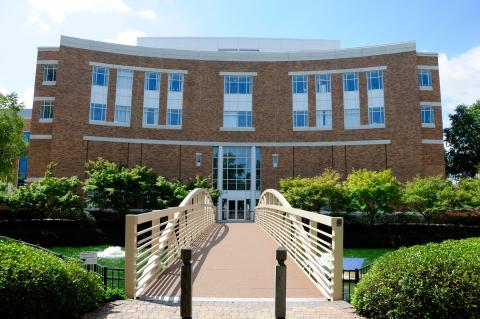
OBS is available only by reservation. It’s located in Gornto Hall, Room 103A and is available to all Digital Learning faculty.

The Division of Digital Learning is excited to offer you our One Button Studio and we hope that you enjoy your experience as you use it.

OBS Uses

The One Button Studio can be used for a variety of purposes, such as:

Course videos

You can introduce yourself and your course to your online students in a friendly and professional way.

Mini-lectures

You can create lecture material

Presentation practice

You can rehearse your speech or presentation and review your performance afterward.

Green screen

You can use the green screen feature to change the background of your video and add fun effects.

Language practice

You can practice speaking a foreign language and improve your pronunciation and fluency.

Software demonstration

You can record a tutorial on how to use a specific software.

Getting Started

Reservations

Please make your studio reservation at least 48 hours in advance.

  • We are using monday.com to handle reservations for the One Button Studio. Please use this form to make a reservation
  • You will receive a confirmation email, as well as a reminder email sent the day before your recording.

Upon Arrival

Access the OBS using your ODU-issued faculty identification keycard
The lights and camera turn on after you walk behind the desk

Accessing Your File

On the upper left section of the desk (USB ports diagram), there are two options where you can put your flash drive. Each port is marked to show you which monitor your content will appear.
If you have a presentation, insert your flash drive and drag your presentation to the desktop.
Open your presentation.
You can utilize the single monitor or use the “presentation view” to show your notes on the teleprompter.
What appears on the monitor on the tabletop is what is being recorded. (Tabletop diagram)

Preparing Yourself for Recording

You’ll find a control panel on the left side of the desk (Control panel location). Use this to manipulate your presentation, your backgrounds, and your position on the screen. You will see the choices you make reflected on the monitor in front of you. Be sure that when you are on camera, you are properly centered. Leave some headroom in the shot.
Step on the floor sign to be sure you’re centered in the video frame, you’re not too close to the green screen, and the microphone is over you.

Before Recording

Once you are ready to record, click the red button on the lower left of the table to begin the recording (Recording button location). There will be a three-second countdown, and a “recording” light will illuminate to indicate when your recording has begun.
A recording light will also be illuminated on the outside of the room to indicate to those coming through the hallway that someone is recording in OBS.

While Recording

Annotation options are available. You can use the Digital Lightboard (middle of the desk) to write or draw on your live video. You may want to practice this process a few times before you begin your final recording.
There is a keyboard and a mouse available for you to advance your presentation slides.

After Recording

Once you are finished recording, click the red button again, and the recording light will disappear. This indicates that your video recording is finished.
The video will be immediately available for you on the desktop. You may upload it to your OneDrive or reload it onto your flash drive.
Once you are finished with your recording, be sure to bring all your belongings with you when you leave; your keycard will only work for the room during your allotted scheduled time.
Simply leave the room and close the door behind you. The system will shut itself off, and the door will lock behind you.

Assistance

If you request assistance, please use the phone on the wall to call for assistance.
For any other inquiries, send an email to DL_OBS@odu.edu

Plan Your Visit

Tips and Guidelines

USB Flashdrive

Bring a USB drive with at least 4 GB of free space so that you can save your video file or use the Airdrop feature to copy the video from the studio computer to their phone or mac laptops if they forgot to get the memory stick or just doesn't have one.. Alternatively, you can add a link to the Kaltura Media page on the ODU website, a cloud storage platform that allows you to integrate your video with Canvas and other online tools.

Arrive 10 minutes before your appointment

Arrive at least ten minutes before your reserved time slot so that you can set up the studio and test and familiarize yourself with the equipment.

Arrive 10 minutes before your appointment

If you are recording a PowerPoint presentation, please use your Instructional Designer's templates. Do not use slide transitions. Plan your slide content and animations. Use font size and colors recommended by your Instructional Designer.

USB Flashdrive

Speak clearly and loudly enough for the microphone to pick up your voice.

Arrive 10 minutes before your appointment

Follow the instructions on the control table to start and stop your recording. You can preview your video before saving it or uploading it by touching the preview button on the control panel.

Arrive 10 minutes before your appointment

Create a script that is direct simple, and concise before you arrive at OBS. Practice the script and your timing then save the final script to your thumb drive.

Appearance & Clothing

Instructions

  • Avoid wearing green clothing or accessories.
  • Avoid tweed, herringbone, small checks, stripes, or other small patterns.
  • Avoid wearing clothing made of glittery fabric or clothing with jewels attached.
  • Avoid large logos.

Instructions

  • Glasses are OK if you need them (they may cause reflections).
  • Keep your jewelry to a minimum (avoid large necklaces and bracelets) Also to avoid jewelry that makes sound when you move.)
  • Solid colors in pale and dark shades work best.
  • Your daily hairstyle is fine; your makeup should be what you normally wear.

OBS Studio Quick Start Guide

Quick Start Guide

  • When you arrive at OBS:
    • Insert your thumb drive containing your files into the port on the control table.
    • Silence your cell phone.
    • Keep in mind when using notes while presenting as the microphone will record the sound of flipping the paper, etc.
    • Select background.
    • Check your framing: to be evenly framed, avoid too much or too little headspace.
    • Check yourself: Relax - Take a deep breath - Smile - Speak clearly.
    • Press the RED button.
  • Recording:
    • To start your recording, press the RED button, wait three seconds, then start talking.
    • Look at the camera, project your voice, and avoid speaking too fast.
    • To end your recording, wait three seconds, then press the RED button. Do not press the button twice in a row!
  • Your recording is saved automatically on the desktop.
  • Now double-check: Review your footage to ensure you like it! You can do as many takes as you need to.
  • If you need help, please use the HELP Phone in the Studio to reach a member of our technical staff.
  • Keep it simple. Remember to smile. Have fun and be yourself!

FAQs

The studio offers the use of a video camera, a microphone, studio lighting, a green screen, an iPad, and a Mac computer.

No, the One Button Studio is equipped with all the necessary recording equipment, and external cameras or equipment are not allowed. This ensures a consistent and user-friendly experience for all faculty members.

You can reserve the One Button Studio for up to 2 hours per session. If you need more time, you can book consecutive time slots.

The One Button Studio is primarily for recording. You will need to use video editing software on your own computer to edit your video after recording. However, our technical staff can provide guidance on how to get started with video editing.

The computer in the One Button Studio has standard video editing software such as Adobe Premiere Pro and Final Cut Pro, along with Microsoft Office applications. You can use these applications to edit and enhance your recorded content.

You can add graphics or text overlays during post-production using video editing software. Our technical staff can provide guidance on how to add overlays to your videos during the editing process.

Yes, you can have multiple presenters in a single recording. Ensure that everyone is properly positioned, and their voices are picked up by the microphone. You may want to practice the timing and positioning before your recording session.

Absolutely, the One Button Studio is suitable for recording content in any language. It's an excellent tool for language practice, pronunciation improvement, and content creation in various languages.

There is no set limit to the number of reservations you can make, but please be considerate of other faculty members and book only the time you need. If you need to make multiple reservations, ensure that you use the studio efficiently.

Your recorded video will be available on the desktop computer within the studio. You can upload it to your OneDrive, save it to a USB drive, or transfer it to your own device. Our technical staff can assist you with this process if needed.

If you experience technical difficulties, please use the HELP Phone in the Studio to reach a member of our technical staff. They will be able to assist you in resolving any issues promptly.